WPF の単純なバインディングの例
このページは、WPF の単純なバインディングの例を示すページです。
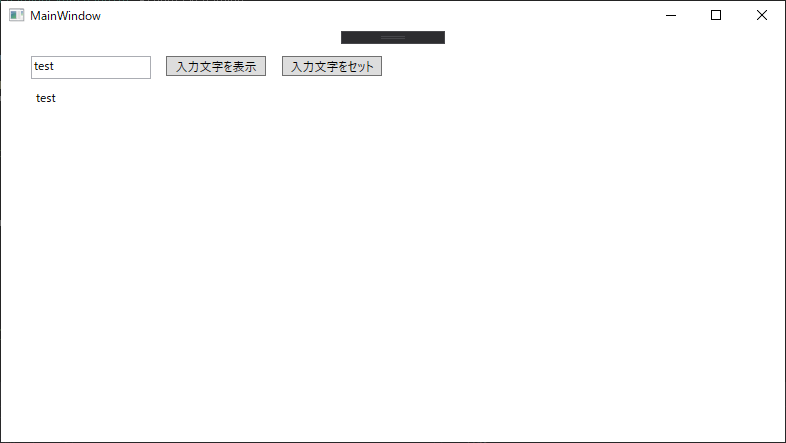
画面イメージ
概要
- テキスト入力してフォーカスを外すと、ラベルにも同じ文字が反映されます。
(サンプルで定義した ViewModel クラス (MainWindowViewModel) の Input プロパティをそれぞれバインディング) - 「入力文字を表示」ボタンがクリックされた時、ViewModel の Input プロパティの内容をメッセージボックスで表示します。
- 「入力文字をセット」ボタンがクリックされた時、ViewModel の Input プロパティに値をセットします。テキスト欄、ラベルにも値が反映されます。
XAML
<Window x:Class="WpfApp1.MainWindow"
        xmlns="http://schemas.microsoft.com/winfx/2006/xaml/presentation"
        xmlns:x="http://schemas.microsoft.com/winfx/2006/xaml"
        xmlns:d="http://schemas.microsoft.com/expression/blend/2008"
        xmlns:mc="http://schemas.openxmlformats.org/markup-compatibility/2006"
        xmlns:local="clr-namespace:WpfApp1"
        mc:Ignorable="d"
        Title="MainWindow" Height="450" Width="800">
    <Grid>
        <!-- 入力欄 (「{Binding Input}」で、DataContext にセットしたオブジェクトの Input プロパティをバインディングしています)  -->
        <TextBox
            Text="{Binding Input}"
            HorizontalAlignment="Left" Height="23" Margin="30,25,0,0" TextWrapping="Wrap" VerticalAlignment="Top" Width="120"/>

        <!-- 入力テキストを表示するためのボタン (Click に指定したイベントハンドラが実行されます) -->
        <Button
            Content="入力文字を表示"
            Click="ShowButton_Click"
            Margin="0,25,519,0" VerticalAlignment="Top" RenderTransformOrigin="8.039,0.538" HorizontalAlignment="Right" Width="100"/>

        <!-- 入力テキストをセットするためのボタン (同上) -->
        <Button
            Content="入力文字をセット"
            Click="SetButton_Click"
            Margin="0,25,403,0" VerticalAlignment="Top" RenderTransformOrigin="8.039,0.538" HorizontalAlignment="Right" Width="100"/>

        <!-- 入力テキストと同じ内容を表示するラベル (入力テキストの変更に合わせて自動的に変更されます) -->
        <Label
            Content="{Binding Input}"
            HorizontalAlignment="Left" Margin="30,53,0,0" VerticalAlignment="Top" RenderTransformOrigin="0.46,-0.322"/>
    </Grid>
</Window>
C#
using System;
using System.Collections.Generic;
using System.ComponentModel;
using System.Linq;
using System.Runtime.CompilerServices;
using System.Text;
using System.Threading.Tasks;
using System.Windows;
using System.Windows.Controls;
using System.Windows.Data;
using System.Windows.Documents;
using System.Windows.Input;
using System.Windows.Media;
using System.Windows.Media.Imaging;
using System.Windows.Navigation;
using System.Windows.Shapes;

namespace WpfApp1
{
    /// <summary>
    /// MainWindow.xaml の相互作用ロジック
    /// </summary>
    public partial class MainWindow : Window
    {
        /// <summary>
        /// サンプル用の ViewModel です。画面側で値が反映されるよう、INotifyPropertyChanged を実装します。
        /// </summary>
        public class MainWindowViewModel : INotifyPropertyChanged
        {
            /// <summary>
            /// INotifyPropertyChanged を実装するためのイベントハンドラです。
            /// </summary>
            public event PropertyChangedEventHandler PropertyChanged;
            /// <summary>
            /// 通知を実行します。(C# 7 用。参考: https://qiita.com/soi/items/d0c83a0cc3a4b23237ef)
            /// </summary>
            /// <param name="propertyName">プロパティ名 (「CallerMemberName」によって自動的にセットされます)</param>
            private void RaisePropertyChanged([CallerMemberName]string propertyName = null)
                => PropertyChanged?.Invoke(this, new PropertyChangedEventArgs(propertyName));

            string _Input;
            /// <summary>
            /// 入力テキスト用のプロパティです。
            /// </summary>
            public string Input
            {
                get { return _Input; }
                // 値をセットしたあと、画面側でも値が反映されるように通知を行います。
                set { if (_Input != value) { _Input = value; RaisePropertyChanged(); } }
            }

        }

        /// <summary>
        /// サンプル用の ViewModel のインスタンスです。
        /// </summary>
        private MainWindowViewModel ViewModel = new MainWindowViewModel();

        /// <summary>
        /// ウィンドウ用のクラスを初期化します。
        /// </summary>
        public MainWindow()
        {
            InitializeComponent();

            // 画面のバインディングに使用するためのオブジェクトを設定します。
            DataContext = ViewModel;
        }
        /// <summary>
        /// 「入力文字を表示」クリック時: ViewModel の Input プロパティの内容をメッセージボックスで表示します。
        /// </summary>
        /// <param name="sender"></param>
        /// <param name="e"></param>
        private void ShowButton_Click(object sender, RoutedEventArgs e)
        {
            MessageBox.Show(ViewModel.Input);
        }
        /// <summary>
        /// 「入力文字をセット」クリック時: ViewModel の Input プロパティに値をセットします。テキスト欄、ラベルにも値が反映されます。
        /// </summary>
        /// <param name="sender"></param>
        /// <param name="e"></param>
        private void SetButton_Click(object sender, RoutedEventArgs e)
        {
            ViewModel.Input = "x";
        }
    }
}